Saturday, September 29, 2012

When all else fails . . . 

make jam! Or pâté. Or pasta. Or a pork roast. Or leftover lobster and shrimp turned into a salad with greens and avocado. Or stuffed zucchini blossoms. All these things and more I have done this week or will do today or tomorrow if my knee cooperates. A slight accident in Riverside Park precipitated the cane and the hobble, but we're enduring the lot. It's called manning up, or to the Brits, doing our bit! In Italian, we'd just say "corraggio!"

Fresh Figs
So, first on the hit parade we have fig jam. They're in season right now and a perfect past time in preparation for the approaching cold weather. It's very simple, actually. Just a bunch of figs with a bunch of sugar and a squeeze of a lime (my personal preference) and some orange extract (a drop or two of that will do), soaked over night in the sugar, which completely liquifies by morning's light, and then cook it to the semi-candy stage and placed directly into jars and leave it until you need to eat it. Quite simple really. 

*If you're ambitious and have the time to wait a period of 3 months or so, you can add 1/4 cup dry mustard mixed with 1/4 cup white wine, 1 tablespoon mustard seed and 1/4 cup cider vinegar for a very spicy Mostarda di Ficchi. The technique is basically the same. The most important issue here is the sterile jars and caps and complete eradication of air which pollutes the jar (and the jam or Mostarda) with bacteria. Both the jam and the Mostarda can be stored for up to a year but once opened, should be refrigerated and used within a 2 or 3 months.

Fig Jam

2 boxes fresh figs (halved, quartered or sliced, depending on how fine or chunky you want your jam to be)
2 cups superfine sugar
juice of one lime 
1/8 teaspoon orange extract

Fig Jam
Halve, quarter or slice the figs (your call here) and put them in a stainless steel saucepan large enough to hold them comfortably with the rest of the ingredients. Add all ingredients to the figs, stir gently to coat the figs with the sugar and cover the pan and leave overnight. Periodically, you should check on the figs and give them a turn or two with a rubber spatula, but only a little. You don't want to disturb the shape of the figs. After sitting "in the dark" all night, there will be a great deal of syrup. 

Place the saucepan on the stove over moderately high heat and bring the mixture to the boil. Lower the heat to the simmer after 4 or 5 minutes stirring at a running boil. Continue to stir periodically, checking vigilantly to make sure that nothing is sticking to the bottom of the pan. If there is anything sticking, the heat is too high. Cook at a simmer until the liquid has almost completely reduced and you can see the bottom of the pan when you wipe it with a wooden spoon or spatula. You will have a thick mass of fig jam. At this point, I usually take a hand blender and process the mixture into a spreadable consistency but if you want pieces of fig in the jam, you can omit this step. 

This amount of fig jam will require 2 small Ball jars with tops and caps, all of which should have been sterilized beforehand. Fill the jars with hot jam and with any utensil that is comfortable (a butter knife works here), push the fig jam down to remove all air bubbles. I personally bang the jar on a couple of kitchen towels to push the bubbles up to the top. Once you've completed this process, cover and store the jars in a cool dark place.

Fig Mostarda

One difference between the jam and the mostarda: I don't process the figs into a paste as I do for the jam. The mustard gives the figs a rather hot and spicy flavor. The quantities of mustard and mustard seeds may be adjusted to compensate for personal taste; less for mild and more for hot and spicy.

Mostarda di Ficchi
1/4 cup dry mustard
1/4 cup white wine
1 tbsp. mustard seed
1/4 cup cider vinegar

Dissolve the mustard in the wine, add the wine mixture, the mustard seeds and the vinegar to the master ingredients and follow the recipe for fig jam above. Complete in the same exact way and store for up to a year in a cool dark place. It will be ready to eat within 3 months.


Friday, September 28, 2012

My Birthday Dinner 

Last night, my puppy, Ludwig, and I were fortunate enough to be invited to the very cozy and private restaurant, Chez Hal's, to celebrate my birthday. I have to thank the chef profusely for serving some of the most fantastic seafood I've ever tasted. So, thank you, thank you and thank you again!!!

The photographs are self-explanatory, but lest there be any doubt, here is the menu:

Mozarella and Olives 

Carpaccio of Tuna and Scallops with Peppe Rosso

Oysters on the Half Shell

Major Prawns (with the heads and tails on)! ZOWEE!

Cold Boiled Lobsters

Potato Salad

Salad made from Red and Yellow Cherry Tomatoes, Red Onion and Baby Beets

Roasted Pears with Mascarpone and Potato Chip Cookies

Photos attached . . . . OMG! And a good time was had by all! Happy Birthday to me!

Mozzarella and Olives 

Tuna and Scallop Carpaccio with Rd Pepper

Potato Salad and Tomato, Beet and Red Onion Salad


Oysters on the Half Shell, Grilled Shrimp and Boiled Lobsters

Thursday, September 27, 2012

Capellini con il Cavolfiore e Limone 

(Angel Hair with Cauliflower and Lemon)

Capellini con il Cavolfiore e Limone
I went to the Union Square Greenmarket on Saturday and bought one of the largest cauliflowers I have ever seen. It was huge! I'm a very big fan of roasted cauliflower and making pasta with cauliflower and lemons is a very good way to say goodbye to summer.

The nice thing about making this dish is that it is simple and all the ingredients can be made ahead of time. Aside from the preparation time for the preserved lemons (2-3 weeks in a container in the fridge - see my post from September 13th), the chopping of the parsley, the roasting of the cauliflower and the grating of the cheese, all you need to do is boil water. Nevertheless, this dish can be made with ready ingredients in less than 15 minutes.

My 4 pound cauliflower
You will need to do a couple of things to prepare for this dish:

1) roast the cauliflower; and 
2) make preserved lemons.

I don't recommend hand made pasta with this dish because the cauliflower is coarse and heavy in weight and requires a sturdier, rather than delicate, dried pasta (linguini, capellini or even a macaroni like gemelli or rigatoni rigati or strozzapreti).

To begin, remove the leaves from the cauliflower; in the case of my gargantuan vegetable, pealing away also required cutting through some of the root to separate the florets from the thick center stem. I often roast the stem as well, but it is entirely optional. One might think that a whole cauliflower weighing roughly 5-6 pounds is an awful lot of cauliflower for one pasta dish, but roasting does indeed create quite a bit of shrinkage. I marinate the cauliflower florets in a mixture of olive oil, anchovies, garlic and pepper (something akin to a bagna cauda without the capers or the butter but not cooked either). That said:

Roasted Cauliflower

Preheat oven to 450º F. If you have a convection oven, with a convection roast setting, set that at 475º F.

1/2-3/4 cup EVOO
1 small container anchovies with the oil (mashed)
4 cloves mashed garlic or garlic pushed trough a garlic press
black pepper corns (12-15 turns  of the pepper mill)
One large cauliflower trimmed of all leaves, each flower torn and broken into smaller florets, stem cut up (optional)

Mash the entire contents of one can anchovies in oil and add garlic, pepper and olive oil. Place all ingredients in a large non-reactive stainless steel bowl and toss to thoroughly coat each piece of the cauliflower.

Arrange the cauliflower on a lightly greased roasting sheet pan and roast cauliflower for 30-45 minutes. You should monitor the progress of the vegetables after 20 minutes to make sure nothing is burning. Every oven is different so it is important to gauge the proper roasting time. I turn the pan after 20 minutes to ensure proper browning. Once cauliflower is cooked, remove from oven, let cool. At this point you may either proceed with the recipe or store the cauliflower until you are ready to use it.

Once you are ready to assemble the final dish, you may want to make sure you have a mis en place, ready to go once the pasta is drained and ready for serving.

Roasted Cauliflower
1 large head roasted cauliflower, cut into smaller florets
4 tablespoons chopped preserved lemons
4 tablespoons preserved lemon liquid
4 tablespoons EVOO
1/4 cup chopped parsley
1/2 pound capellini (or pasta of your choise
Kosher salt
1/4 cup water from pasta pot
Reggiano Parmiggiano


Preserved Lemons
Chopped Parsley


Assemble the prepared ingredients in bowls. Cook the pasta in a large pot of water. Add a handful of Kosher salt to the water when it comes to the boil. Let it  return to the boil and add the pasta and cook according to the directions on the box. For Capellini, cooking at a rolling boil shouldn't take any longer than 5 minutes. Just before draining the pasta, measure out a large ladleful of pasta water and add it to the bowl of lemons and olive oil. Drain pasta, put pasta in a large bowl, pour the lemon mixture, the cauliflower and some of the parsley over the pasta and toss to coat the noodles. Arrange on plates (I prefer bowls) and serve immediately. Serves 4 as a first course or two as an entree.


Capellini con il Cavelfiore e Limone


Wednesday, September 26, 2012

Winnie Verona's Potato Chip Cookies


To my sisters' great consternation, I am sharing this recipe with the world. There are many such recipes which have gone to the grave with its creator and thankfully, my Mother wrote this one down. 

POTATO CHIP COOKIES

Potato Chip Cookies
I don’t know what possessed her - her unwillingness to throw food out? -  but one night, after spending days making 1000s of Christmas cookies and still having leftover cookie dough, my mother had the brilliant idea of incorporating potato chips into cookie dough to see what would happen. Well, what happened was that she concocted probably the most delicious cookie imaginable. Not only that, but for years after that, friends and relatives begged her to make these cookies all year round. My mother, being my mother, of course, complied! The combination of sweet and savory is taken to its limits and then goes one step further with the dusting of confectioner’s sugar. These cookies are not for the faint of heart, but they aren’t heavy in the least. They are simply and unabashedly the most subtle sugary lozenge one can eat.

This recipes makes about 130 cookies, but you can halve the recipe if you don't want to make that many cookies or use that much butter! I’ve given both amounts in the ingredients list.

1 lb. Butter/1/2 lb. (4 sticks/2 sticks)
1 cup sugar/1/2 cup
3 1/2 cups flour/1 3/4 cup
1 1/2 tsp. Vanilla.3/4 tsp
2 full cups/1 cup Crushed Potato Chips (a rolling pin works best for this)
Confectioners Sugar for sifting

Preheat oven to 350º 

Oven temperatures vary so if you want to experiment with the temperature and go hotter, by all means; every oven is different.

Cream butter and sugar in a mixer until pale yellow. Add the Vanilla and Flour and mix well. Fold in the crushed potato chips and work the dough with your hands into a ball on a floured work surface. Taking a teaspoonful at a time, drop balls onto an un-greased cookie sheet. Do not flatten but use the tines of a fork and press into the dough (like peanut butter cookies).

Bake for 10-15 minutes until lightly browned (check after 5 or 6 minutes and turn the sheet around if necessary).  I leave mine in just until they are lightly browned on the edges. They will still bake while cooling.

Sprinkle powdered sugar on cookies once they're completely cooled. Keep in a plastic container or a metal tin lined in plastic wrap. The cookies keep in the refrigerator for two to three weeks and they freeze very well for up to one year.

Enjoy!

Sunday, September 23, 2012

Risotto all'Onda 

I've been promising risotto for a few days now. Last night I made this risotto recipe (for the first time) and it was outrageous. I had some leftover gravlax and I was going to stuff zucchini blossoms with crabmeat but decided otherwise once I saw what my local grocery store was asking for lump crabmeat. So, I sauteed huge shrimp in butter (heads and shells intact) and lots of salt (shells absorb most of the salt so it's okay). What could be better than risotto cooked with onions, nutmeg, a court bouillon made from lobsters, Prosecco, gravlax and some heavy cream? I then added the shrimp to the risotto at the end when I presented the dish at the table. Not only was it gorgeous to look at, but it was delicious. I don't say this often, but it's a dish I could sell! 

Risotto all'Onda
This risotto takes its inspiration from the Ventian practice of making risotto a little "wet." The risotto should be creamy and some liquid should remain between the grains, thus producing a wavelike texture, just like the sea. As you can see from the photograph, I think I pretty much succeeded. However, there are still eons to go before this dish (for me) is perfect. So I shall make it again; and again; and again to see if it can't be improved upon. 

Whatever the case may be, here is what needs to be done.


Extra Virgin Olive Oil
1 medium onion (minced)
1 cup Risotto - Arborio will do, but I prefer Carnaroli 
2 cups Prosecco
3-4 cups court bouillon made from any shellfish (preferably lobster or shrimp, but fish stock will do or octopus broth) heated in a saucepan ready to go. Liquid must be hot.
3-4 oz. Gravlax, sliced very thin and then coarsely chopped 
Kosher salt
2 tbls. butter
1/4 cup heavy cream
3 tbls. Grana Padano

1 lb. large shrimp or scampi, heads, shells, and tails intact
4 tbls. unsalted butter
Kosher salt
pepper
nutmeg

In a large deep pan, heat the olive oil and add the onions. Over moderately high heat, saute the onions until they become transparent. Add add the rice and stir to coat the rice. Add 1/2 cup of Prosecco and stir until almost all the liquid has evaporated. Lower the heat to a simmer and start adding the court bouillon, one ladle full at a time, into the rice. Slowly work the broth into the rice, stirring constantly until almost all the liquid has evaporated. Continue doing this in exactly the same fashion as you until the rice softens. Add several gratings of nutmeg. The rice will thicken and become very creamy. After the 4th or 5th ladling, add the gravlax. Continue with the broth until the rice is almost done. Mix the cheese and cream together and add it to the rice and stir. Always be aware of the heat and adjust so the rice doesn't stick to the bottom of the pan. 

While the risotto is cooking, melt the butter in a separate pan over moderately high heat and add a handful of salt and then the shrimp. Stir to coat all the pieces with salt and butter and cover the pan and cook for about 5 minutes or until the shrimp has taken on a coral color. 

The last addition of liquid should be a generous pouring of Prosecco. The rice at this point should be very creamy. Cook only until the rice begins to reduce and turn off the heat. Taste for seasoning and adjust if necessary. 

Spoon the rice on a large plate or platter and arrange the shrimp around the risotto. Pour all of the juice from the pan in which the shrimp was cooked and drizzle it all over the shrimp and the risotto. Serve immediately. Serves 2 as a main course or 4 as a first course.

I save the shells and freeze them. They make an extremely good and very rich stock.

Frozen shellfish shells


Saturday, September 22, 2012

Caponatina (Gaboladina in Sicilian

A Sicilian dish hearkening back to the age of the Saracens


Caponatina
If, as Waverly Root says in his authoritative The Food of Italy, Italian food draws its roots from the Etruscans (polenta), Greeks (the bounty from the sea and bouillabaisse) and Saracens (pastries and spice), then Sicilian cuisine is the result of the centuries-long and varied occupation by the Phoenicians, Greeks, Romans and Saracens; the French gave nothing to the Sicilian kitchen, they only took, and took. Although the Saracens did occupy the island for a few hundred years, they weren't willing to part with their culinary secrets on a terrain that was not meant to be theirs for very long. In stark contrast to Spain, which was part of the Arab conquest for more that 800 years, Sicily didn't really benefit from the Saracens until well after the Crusades when the Byzantines and the Venetians brought back the long hidden secrets of sugar and spice; and then Spanish rule over Naples and Sicily. Of course, there is much more that the Saracens brought to the dinner table than spices and pastries. They brought rice, tarragon, spinach, apricots, pomegranates, sweet oranges, lemons, as well as the art of making the precursor to ice cream: sherbet. They also brought al-cohol, in the form of a fig brandy, which in turn became what we know today as grappa. Oh yes, and I forgot, around 1500, something else surfaced in the West from the sands of Araby: the eggplant! Besides all this, of course, we all know Italian food is dominated by one ingredient which altered the very structure of Italian cuisine and that is the tomato. Indeed, the further south you go, the more one finds the tomato in dishes of every kind. And just like butter and cream are equated with northern Italian cuisine, so too are the tomato and olive oil equated with La Cucina del Sud.


Anyone who has eaten in Southern Italian restaurants, even Tuscan or other regional Italian restaurants can tell you that they have seen - and most assuredly eaten -  caponata served in one way, shape or form. I've seen it served on bread, without bread, with bread sticks (grissini), even the most unwelcome celery stick, while here in the United States, one too often experiences a mere facsimile, hardly la vera cosa! Caponatina is the endearing diminuitive of the word caponata and their names basically reflect the same dish. It is thought to have originated in Catania on the eastern shores of Sicily, but you will find various and different versions of it throughout Sicily. No matter what form you've tried, tart, hot, sweet (dolce), bittersweet, the real deal comes not only from the heat as well as the sweet but also the bitter or amaro or agro. It is probably one of the best examples in Italian cooking of what is called agrodolce (bittersweet). What results from the combination of vinegar and sweet meats reduced to a relish or paste is something only heaven allows. You'll note that I have invoked heaven before in some of the recipes I've brought to your attention. Here on earth, at this stage of life, we all need something to transport us out of ourselves and out of the real world and for me, food - and music, of course - does that in spades. What better way to while away the time before dinner than to nibble on eggplant and olives with tomatoes and raisins metamorphosed into a symphony of so many contrasting flavors and textures. 

Personally, I hold this dish in great esteem. It never fails to please. It brings a smile on the faces of all who eat it (at least mine does). You can find this in small quantities in precious cans imported from Sicily, but it won't be as good as the caponatina you make at home, fresh off the stove, or a day or two or three old after having been refrigerated and then brought to room temperature. Like most Sicilian dishes, it speaks to you down through the ages.

The recipe that follows is a variant of my Grandmother's and my Mother's recipe. It has been lovingly passed down from generation to generation. This recipe yields about 8-10 cups of gleaming relish and can hold its own on any plate of assorted antipasti. My own personal touch: I've also added preserved lemons as an ingredient, but only just a little. The real secret here, though, is that each ingredient must be cooked separately, where eggplant, peppers (sometimes),  onions, celery, each one assert and retains something of their own characteristics; the crunch of the celery, the fruit of the olives and the raisins (also optional), the pungency of the tomatoes and   the one thing that holds it all together, the chunky and caviar-like consistency of the eggplant.

1-2 firm eggplants (no wrinkled skin or soft spots please!) - Roasting is optional (see below)
1 large yellow onion finely chopped
3-4 stalk celery coarsely chopped on the bias
6 cloves garlic smashed and chopped (this is a conservative amount. I have been know to use an entire head)
1 pound pitted assorted olives coarsely chopped or left whole (your choice)
1 cup golden raisins
1 cup currants (or a variant of another sort of dried berry such as cranberry)
3 tablespoons capers (optional)
1 large can of peeled whole San Marzano tomatoes (crush tomatoes with your hands plus the juice)
1 small can tomato paste (if you want more tomato)
4-6 anchovy filets in oil (they will completely disappear during cooking but will add much depth to the flavor of the caponatina)
1/2-1 cup (or more) Extra Virgin Olive Oil (EVOO)
Kosher Salt to taste
Black Pepper
Red Pepper flakes
3-4 wedges preserved lemons finely chopped (optional)
1/4 cup chopped fresh thyme
1 whole bunch of fresh basil washed completely free of sand (from this take 1 cup fresh basil leaves, stems removed and then piled one on top of the other, rolled and then sliced into chiffonade, the rest can be added whole at the end of cooking before storing in jars)
1 cup chopped parsley
3 tsp. chopped fresh rosemary
3 tsp. chopped fresh sage
1-2 tsp. fennel seed
1 tsp. anise seed
3 tbls. unsweetened cocoa powder
1/2 cup red wine or Balsamic vinegar

To begin: line a large baking sheet or two with paper towels. Place sliced eggplant on the paper towels and generously salt each slice and allow to sweat for about 45 minutes, turning occasionally (salt the other side after first turn). When the eggplant is softened somewhat, you can either proceed to the next paragraph OR, place the slices on an well-greased baking sheet and brush with olive oil mixed with some kosher salt and thyme. Roast in a 475º oven for about 45 minutes, turning occasionally. The eggplant will be quite soft and somewhat charred at the edges. This can be made ahead of time, even the day before you intend to make your caponatina. If you do make it ahead, store the slices in a plastic container and pour some olive oil over the slices and refrigerate until you need them.

It's advisable to have everything ready to go (mis en place) so you don't find yourself in the lurch during the cooking because once you start, you'll be surprised at how quickly everything comes together.

Dice the eggplant into medium sized cubes. In a large and deep frying pan, heat enough oil under moderately high heat and start cooking the eggplant (you may have to add more oil as you go). Saute until lightly browned and the eggplant has begun to render its juices. Remove the eggplant, add the onions, garlic, celery and herbs (except the whole basil leaves) and saute until the vegetables take on a transparent color. Add the olives, capers, preserved lemons (optional), anchovies and dried seasonings to the mix and continue to cook. Return the eggplant to the pan.

In a separate bowl, take the peeled tomatoes out of the can and place in a large bowl and crush them with your hands. Add the cocoa powder to the tomatoes and add this mixture along with any juice from the can of tomatoes into the pan. Turn the heat up to high and bring to the boil.  Let the mixture boil for about 2-3 minutes and then turn the heat down to low, cover the pot and cook for 20-30 minutes. You need to pay a great deal of attention here. Like risotto, the caponatina must be stirred every so often to ensure that it doesn't stick to the bottom of the pan, but if you adjust the heat correctly, it will cook and you can leave it undisturbed for the alloted time so it sweats. When you uncover the pot, there will be a great deal of liquid. Turn the heat up and bring to the boil and then turn down to the simmer and stir occasionally, letting the liquid reduce. The caponata will take on a thick texture after it cooks down after about 20-30 minutes. You will know it's done when oil starts to appear at the sides of the pan and a wooden spoon makes a path at the bottom when dragged across the pan. You want a dense mass of relish where everything glistens. Add the vinegar and mix thoroughly, then and add all of the basil leaves and  turn off heat. Taste for seasoning.

As you can imagine, there are many variants to this recipe and many ways to go about preparing it. I've laid out a few options herein which are different than my recipe:

you can omit or adjust the amount of the red pepper flakes if you don't want it too hot or hotter; you can omit the raisins and the vinegar if you don't want it agrodolce; you may keep the raisins but omit the vinegar and vice versa. As you will see below, even cocoa is a welcome addition (thanks to the New World!). Any of these omissions or combinations are perfectly acceptable. Caponatina is made all over Sicily, in every province and region, as well as on mainland Italy, and they all have their own way of making it. It is a Sicilian dish gone universal; as they say in viniculture, it has many terroirs.

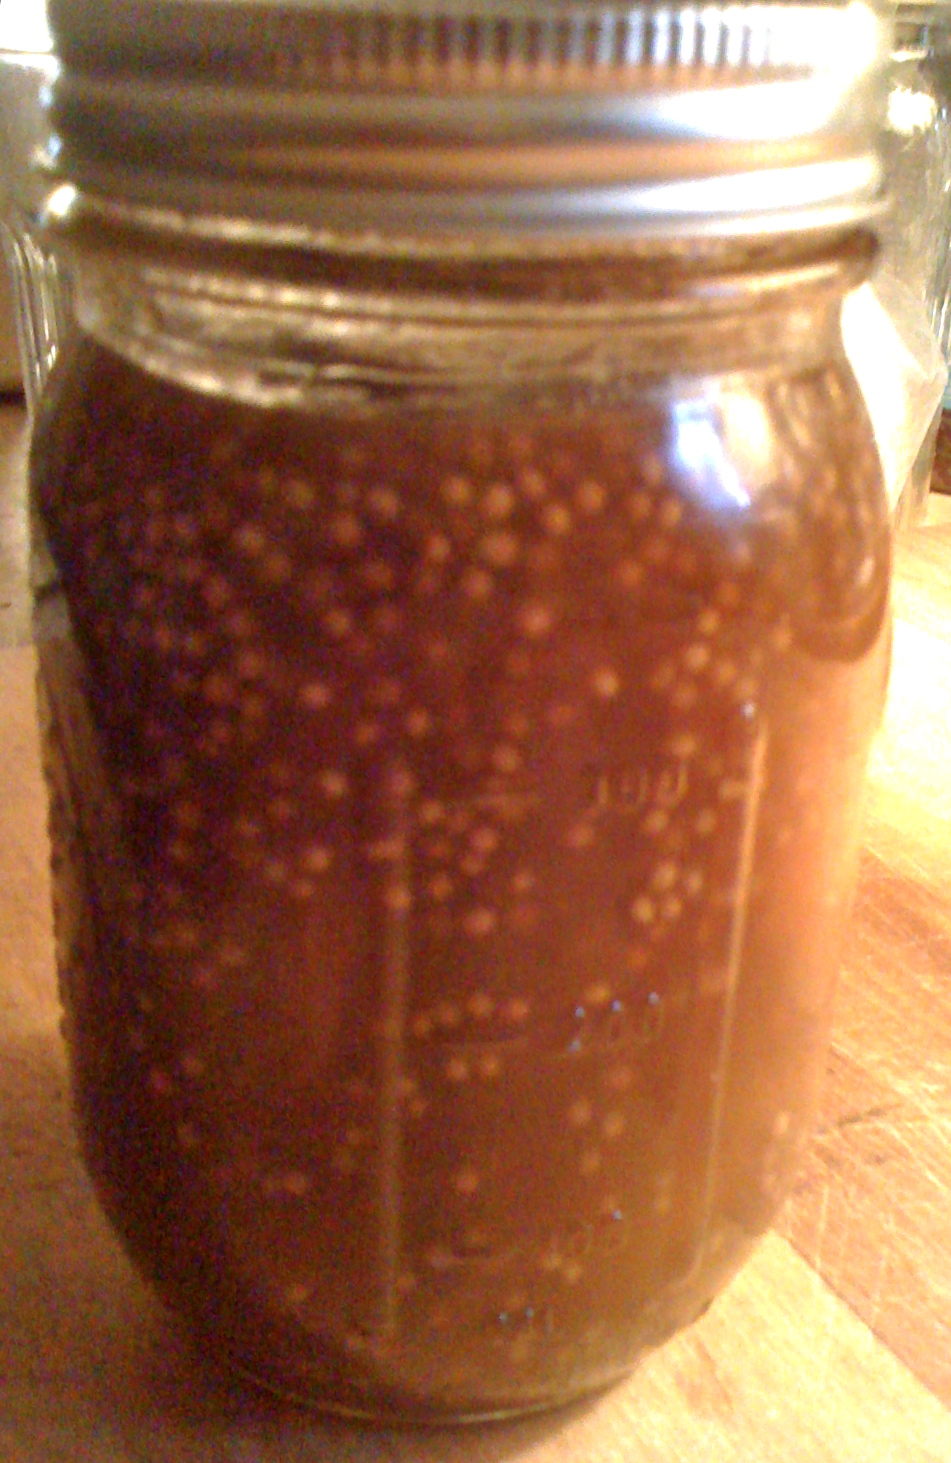
You can serve it immediately or let it cool completely before you refrigerate. It's always more delicious the day after it's been made. It will keep in the fridge for several weeks and in the freezer for up to a year. If storing in jars, I always top it off with a layer of EVOO so there is a good seal. A good olive oil seeps into the caponata and adds flavor to the mix.

Buon appetito!

Wednesday, September 19, 2012

Braised Chicken with Onions, Capers, Lemon and Herbs 

What with all this talk about preserved lemons, I suppose anyone reading this was expecting at least something containing said rinds and fruit that would be useful to at least one discerning palette. And so it is that I am here to present one such recipe today. It's odd that I rarely cook chicken for human consumption. I cook it for my dog and feed it to him everyday mixed in with his dog food, but it is indeed something I eschew. I prefer duck and turkey to tell you the truth - and goose - but that's for another day.

Don't get me wrong. I do like chicken on occasion and experimented with something involving preserved lemons just the other day. I must have succeeded in a very big way, because, my sister Monica - who does indeed like chicken and is someone with a very  discerning palette - told me that it tasted like our Mother's chicken. Now that is praise indeed! Here is what I did: I marinated the chicken with salt, pepper, cayenne, preserved lemons and herbs for several hours and then sauteed a vast amount of onions, garlic, celery and parsley, plus a bunch of fresh sage, thyme and rosemary, took it out of the pan, sauteed chicken thighs and legs until they were nicely browned, put the vegetables and herbs back in the pan, added capers, a couple of wedges worth of preserved lemons (diced), 1/2 cup dry vermouth and 3 cups chicken stock, covered the pot and braised the chicken on the stove. This was preceded by a marinating period of about 4 hours in the refrigerator. Very simple and very delicious. I served it with 1 cup of risotto cooked with 2 cups of the chicken cooking liquid and a simple green salad. You will notice that the predominant herb is sage. It offsets the tanginess of the lemons very nicelySorry, no pictures this time around.


Serves 4-6 

Marinade


8-10 pieces chicken (legs and thighs, skin on)

1/4 cup fresh thyme (finely chopped) 
1/4 cup fresh rosemary (finely chopped)
1/2 cup fresh sage leaves (coarsely chopped)
1/2 cup fresh chopped parsley
3 cloves of garlic (smashed), more, depending on how strong you like it
2-3 wedges preserved lemons chopped
1/8 tsp. Cayenne pepper
1/2 teaspoon hot pepper flakes (optional)
Kosher Salt
Pepper
1/4 cup Extra Virgin Olive Oil (EVOO)

Place all ingredients in a stainless steel or Pyrex bowl large enough to fit all pieces comfortably. Mix thoroughly, cover with plastic wrap and place in refrigerator for several hours.


Cooking the Chicken


Two onions, finely chopped

One leek (cleaned and sliced, (green part trimmed and sliced as well)
3-4 stalks celery (chopped at the bias, making about 2 cups)
EVOO
1/4 cup capers (drained)
1/4 cup dry vermouth
3 cups chicken stock

In a large enough pan to hold the chicken, saute the chopped onions, celery and leeks in a covered pan over moderate heat until they start to take on a translucent color. Remove from the pan. Saute the chicken over moderate heat until they skin takes on a crispy texture. Put the onions, leeks, the marinade juice and more lemons and parsley if you like in the pan along with the capers back in the pan with the chicken, add the vermouth and allow it to burn down somewhat before adding the chicken stock. 


Bring to a boil, reduce heat to a simmer and cover the pot and cook for about an hour, periodically checking to see that it isn't boiling or sticking to the bottom of the pan. 


When chicken is done, check for seasoning, let rest for 5 minutes and serve.

Finished Gravlax

As promised, here are pictures of my finished – and more than half eaten – Gravlax. Talk about delicious! Look for Risotto with Gravlax in the next couple of days!


Sliced Gravlax

What's left of an entire filet

Friday, September 14, 2012


FINOCCHI BRASATI CON I FUNGHI E PORCINI

BRAISED FENNEL WITH PORCINI AND OTHER MUSHROOMS

Braised Fennel

The marriage of fennel and mushrooms may seem unlikely since they both have such distinctive flavors but, what results from the addition of a braising broth made from dried porcini is total decadence.  Two rich flavors are then augmented with several tablespoons of cream to add depth to an already profound flavor base. This fennel is a perfect accompaniment with veal, pork and meatier types of fish, such as monkfish and skate, even cod or salmon, and definitely grilled tuna. With the substitution of vegetable broth for the meat stock, it can be included in a very nice vegetable platter for a vegetarian or vegan.

You will need a good stovetop grilling pan as well as a cast iron or heavy enameled casserole pot to braise the fennel (Le Creuset fits the bill here perfectly). 

Preheat oven to 350º

2-4 whole fennel bulbs, quartered with root ends kept intact1/2 cup olive oil2-3 cups hot stock (chicken or veal or vegetable)Kosher saltpeppernutmeg1 minced shallot1-2 ounces dried porcini mushrooms, cepes or morels1-2 cups liquid from the reconstituted porcini2 cups fresh white or cremini mushrooms, remove stems and chop, slice the tops, sauteed in butter and reserved for braising3-4 tbsp. heavy cream2 tbsp. unsalted butter1/2 cup chopped flat leaf (Italian) parsley2 tbls. chopped fennel fronds

Cut off stalks of the fennel bulbs and reserve for another use such as salads. Reserve fronds and chop finely for garnish.

Chop parsley for same and mix with the fennel fronds and reserve for final garnish.Mince shallots and reserve.

Place porcini in a clean, dry bowl and immerse them in one cup of boiling water.
Brush or "paint" the oil on all sides of the quartered bulbs, sprinkle some kosher salt and then grind some fresh pepper on the bulbs, and then do the same with some fresh nutmeg. Place them on a very hot stovetop/cast iron grill  and lower heat to avoid smoking and grill until they are lightly browned and grill marks are visible on all three sides of the quartered pieces (about 15 minutes). Let rest.

Quarter the fennel bulbs and trim all hard or discolored, unwanted exterior skin, but keep the bulb quarter intact.

Pour the hot stock slowly into the grill pan to deglaze. Melt some of the olive oil and butter together in casserole dish, sautee the shallots, pour juices from the grill pan into the pan and sauté the mushrooms for a couple of minutes. Add some salt, pepper, nutmeg, stir and cover the pan over moderate heat for 5 minutes. After uncovering pan, you will find that the mushrooms have rendered an enormous amount of liquid. Raise the heat and cook until the juices have been reduced to about 2 teaspoons of liquid. Drain the porcini and reserve the liquid. Add the porcini and 2 cups of the stock. Add the fennel and bring liquid to the boil and remove from heat. Cover pan and place it in a 350º oven. Braise in the oven for about an hour, turning every so often so all sides are being braised evenly in the liquid, making sure the fennel quarters stay intact. Spoon stock over the exposed fennel occasionally. When they are shriveled slightly and golden remove he cover and braise for another hour or until most of the liquid has reduced to about 1/2 cup. Remove from oven and let rest for about 20 minutes. There should be very little broth left in the pan (perhaps 5 tablespoons or a little more. Place on moderate heat on the stove and pour (hot, reheated) porcini liquid into the pot but through a sieve lined with cheescloth or a paper towel (to keep any gritty sand or dirt out of the cooking liquid). Bring to a boil and reduce to simmer until liquid is reduced yet again to about 4 or 5 tablespoons. Add heavy cream and cook without disturbing any of the fennel bulbs until cream is thick and bubbles like lava. Garnish with the parsley and fennel fronds and serve immediately.

As I said above, this dish goes well with a variety of dishes, be it meat, fish or other vegetables. Like many other braised dishes, it is almost always better the next day. I have often used leftover braised fennel as an ingredient in a vegetable lasagna. But, one can eat it as it is - a real meal in itself! 

Buon appetito!


Thursday, September 13, 2012


Preserved Lemons


The use of only a handful of ingredients make this recipe incredibly easy to prepare, and the rewards are great. Preserved lemons also have a fairly long shelf life in the fridge and can be used in stews, salads, salad dressings as well as meat dishes and couscous which attest to the fact that they acquired their roots from Middle Eastern and Mediterranean cuisines. However, this simple condiment has acquired new dimensions in today's gourmet world and can be tasted very frequently in dishes ranging from salads to roasts and everything in between. I've used it with   farro, couscous, poultry, lamb, pork, fish, risotto and so much more. It is something which I always have in the fridge and something that I have of late used more and more to add a little zing to an otherwise mundane dish of food. It should, however, be used sparingly. It should entice, not overpower. If used correctly, it will definitely surprise, even stun you with it's immediately recognizable flavor or completely bowl you over by it's audacious stature on the plate: that pungent bit of tartness punctuated by a burst of salt.  It is a force with which to be reckoned, and, oh, what a reckoning!

Preserved Lemons
Makes 6 cups of lemons with juice


8-10 lemons
1/2 cup high-quality sea salt or Kosher Salt
1 teaspoon black and red peppercorns
1 teaspoon coriander seeds
3-4 bay leaves

Wash and scrub lemons under cold water and pat them dry. Roll the lemons on a cutting board to cajole the juices beneath the rind before cutting. Quarter 5 of the lemons without cutting completely through, leaving them intact at the bottom. Rub a heaping teaspoon of salt into each lemon and start layering a glass preserving jar with each lemon, sprinkling in the remaining salt and some of the seeds and bay leaves intermittently as you proceed. Juice the remaining lemons and pour the juice in the jar to completely cover the lemons. Add water to cover, if necessary. Seal and leave in the fridge for at least a month to allow rinds to soften before using. I check on the jar periodically and shake it up to make sure the salt doesn't settle at the bottom of the jar.


To use, remove one lemon and remove a wedge from the heart/root. Some recipes call for rinsing the lemon under cold water; I rarely do. You can remove the rind and discard or keep intact (optional) and cut or slice the fruit and add to whatever it is you are making. You can puree the rinds and/or the lemon for dressings or even use it whole, just make sure you remove the seeds. The lemons should always be refrigerated.


Several recipes that I've consulted about preserved lemons seem to be at odds about shelf length. One book says a month and that they should be frozen and thawed - with very little salt - in zip locks bags three times and then finally immersed in olive oil and frozen and thawed again before putting them in a preserving jar. The majority, however, all concur that with high amounts of salt and juice, and ensuring that the lemons stay covered in liquid, it is possible to keep them in the fridge for at least a few months before any harm will come their way. My rule of thumb is this: make a big batch in May and make sure you use them up by October before you make a new batch. 


Tuesday, September 11, 2012


From soup to nuts, that's what I say. So, it's only fitting that we should have first embarked with Oysters (not so soupy but a start) and go directly to the nuts, in the delectable form of the pecan finger!
PECAN FINGERS
My mother used to make these at least twice a year and they are incredibly simple to make. She would always make them for Christmas, along with the thousands of other cookies she confected. Inevitably, she would have to make more by the time Christmas finally arrived because everyone, especially my father and I, would devour them before the holiday was even upon us. Why? Because they were/are incredibly delicious! Every time I make them, I smell my mother in the aromas wafting out of the oven and then in the cookies once they are dressed with - what else? - more sugar(!) and it brings back so many wonderful memories of our kitchen, our family life and the love that was ever present in our house. The cost of pecans these days makes these cookies prohibitive, but I've been known to make these throughout the year for almost any occasion - any excuse to make them is fine with me. 
2   Cups Unsalted Butter (1 pound)
1   Cup Powdered Sugar (sifted)
½  Tsp. Salt
2   Tsp. Vanilla
2   Tsp. Water
4   Cups Flour
4   Cups Pecans (finely chopped)
Preheat oven to 350 degrees.
Chop the nuts in a food processor or use a rolling pin on a wooden board. In a large mixing bowl with a balloon whisk, cream butter, add sugar, salt, vanilla and water. Blend until creamy in texture and pale yellow in color. If you have a dough hook for your mixer, switch that with the balloon whisk. Add the flour and pecans and mix well. I prefer using my KitchenAid mixer instead of the Cuisinart because it over-processes the dough. Chill for about 15 minutes if the dough is too soft. Using a level teaspoon of cookie dough and rolling the dough between your two hands, shape the dough into finger-sized logs (they should actually look like a finger). (If you are Sicilian or Italian, don't forget to make St. Joseph's staff as the first cookie.) Place the cookies on an un-greased cookie sheet(s) and bake for 15 minutes (depending on the speed of your oven - and the heat - start checking for doneness after 8 minutes and turn the sheets around in the oven if necessary to prevent uneven baking). These cookies are very delicate and more a confection than a cookie so if you bake them too long, i.e., burn them, they will dry out and crumble. Let cool for an hour. Roll each cookie separately in plenty of powdered sugar (about 2 cups in a bowl will do).
Makes about 10 dozen cookies. 
These cookies stand up very well to refrigeration and freezing so you can store them for future use; that is, if they last that long!

Just an aside here: I received several emails about my first entry regarding the pros and cons of eating oysters raw vs. cooked/bakd/roasted, etc. I would appreciate it if you would reserve your comments for the blog instead of sending me emails. It is a public forum and I invite and welcome comments on any and/or all of the recipes you will eventually find here. Cheers!

This is my first entry. I am a pianist who loves to cook. I'm a sorta type A personality who must have everything his way and is always right - well almost always right about just about everything.

So anyway, I've decided to start a food blog. So many of my friends and family keep telling me that I should share my recipes and fabulous menus with the world and I am here to tell you that I shall endeavor to do exactly that over I don't know how much time. Whatever it takes to do something well. 


So let's start with something good. 


Oysters Rockefeller (my version!)

I have always adored oysters - no matter how they are prepared. Many, many years ago, I knew a Swiss chef, let’s call him Arturo, and I often asked him for pointers, especially about sauces. I so often tried to make my Hollandaise Sauce taste like the sauce he produced in his restaurant and with so little success that I finally asked him one night what he did to make his Hollandaise so delicious. He had often given me tips before on how to make better sauces or give them more flavor and spice, but this was so simple and straightforward it was almost embarrassing! All it required was a dash of this and a dash of that, a pinch of this and a pinch of that. Isn’t it always the way? Chefs develop a flavor to their own liking and incorporate it into something rather standard even though difficult to produce - and Hollandaise IS difficult because it requires concentration and discipline - and voila! . . . you have something new! Given that Oysters Rockefeller do require Hollandaise Sauce I will include the “secret” ingredients but am omitting the recipe for Hollandaise Sauce (if you really want to go the whole nine yards, use Béarnaise sauce!). Please refer to Julia Child or Jacques Pepin or “Le Repertoire de la Cuisine” by Louis Saulnier or the Internet, which will give you the exact ingredients and directions necessary to create a proper Hollandaise Sauce. I’m assuming that if you can even think about making Oysters Rockefeller you know what Hollandaise requires and you have a budget unfettered by cost concerns. But getting back to Oysters Rockefeller, the combination of oysters, spinach, bacon and shallots flavored with Pernod and then topped with Hollandaise and Parmiggiano might seem like overkill or even excessive, but trust me, gilding the lily never tasted so delectably sweet. The icing on the cake is getting to wash it all down with the lingering liquids of said bivalve remaining in its shell!  The oysters should be creamy, tender and touched with texture that will literally melt in your mouth. Make sure you get a good oyster shucker and make sure you wear gloves or pad your hands with a couple of good dish towels while you shuck the oysters. Being a pianist, I’m always extremely careful with this part of the preparation. You cannot be too careful because oysters can often be a real challenge to open. Monsieur Pepin suggests bathing them in hot water for a few seconds, which also does the trick for difficult oysters. But remember, since the oysters are going to be cooked anyway, you don’t have to worry about spoiling the meat in the shell. 

Serves four

2 dozen Oysters in the shell….sorry you need to shuck them at home. 

4 lemons
2 cups basic Hollandaise (or Béarnaise) Sauce
Add to that and whisk until blended:
A dash each of Paprika, Cayenne Pepper, Nutmeg, Worcestershire Sauce and Tabasco.
Dot with pats of butter so a skin doesn’t form on top. Set aside and keep in a warm spot but not near a heated oven, otherwise the sauce will separate. If it gets too cold, you'll have to warm the sauce up by whisking it over a pot of warm water.
Spinach and Bacon Mixture
1-2 pounds chopped spinach (fresh or frozen) If you use frozen chopped spinach, make sure it is thawed 
completely so it cooks evenly. Fresh spinach should be cleaned and coarsely chopped. One pound for 
36 oysters is conservative so it’s better to have more than less spinach. Ultimately, you want 2 cups of the spinach mixture.
1 1/4 inch slab of Pancetta or Bacon finely diced and fried until somewhat crisp
2 shallots (minced)
3 tblsp. water
Salt and Pepper to taste
Dash of Nutmeg
Dash of Cayenne Pepper (just a dash)
3 tblsp. Olive Oil
3 tblsp. Unsalted Butter
1/4 cup Pernod or 2 tablespoons Anise Extract
1 cup freshly grated parmesan cheese. (Reggiano Parmiggiano or Grana Padano please)
Preheat Oven to 350º F. 
Heat a large heavy cast-iron skillet. Melt the butter with the olive oil and add the pancetta or bacon and cook until somewhat crisp (DO NOT discard the rendered fat from the bacon). Add the shallots and saute until they become translucent. Add the Spinach and water (if using fresh spinach, there will be a mountain of it in the pan. Cover the pan for a few minutes and the spinach will have wilted and will have been greatly reduced in volume). Uncover pan, stir contents and salt and pepper to taste. Add nutmeg and Pernod. Continue cooking until mixture is a dense mass. All liquid should have evaporated. Turn off heat and let the mixture rest for a few minutes. (Set aside until you are ready to shuck and bake the oysters
Preheat the oven to 375º F.
Shuck Oysters, discard half of the shell and place all of the oysters on a roasting pan big enough to fit in the oven. Large cookie sheets will do but it is preferable to have trays with sides so the juice doesn’t run off and fall to the floor of the oven. Once all is in place, drizzle the oysters with lemon juice, and take a small demitasse spoon - or something that small -  and spoon out enough spinach to completely cover the oyster. Do this until all oysters are covered and bake in the oven for 5 minutes. 
Remove pan from the oven. Turn the broiler on (you can use a blow torch if you like but I prefer a hot broiler). After making sure that the broiler is very hot, quickly spoon out a generous amount of Hollandaise sauce on each oyster. Sprinkle the grated parmesan on each oyster and broil in the oven for no longer than 20 to 25 seconds. Turn the tray if necessary to get a uniform color on all of the oysters. What comes out should be golden crusted pillows on the half shell! Garnish plates with wedges of lemon and serve immediately.
Serving suggestions:
China somehow doesn’t really make it with Oysters Rockefeller. They’re large considering the space the shell takes up and often clumsy on a flat surface. An oval or somewhat irregularly shaped circular bowl - metal is good too - filled with rock salt works very well. The rock salt strangely resembles the rocks or cliffs of the sea and also help to anchor the shells so nothing spills out or tips over. Sorry to use all these maritime terms but you know the saying, when the shoe fits . . .. 
Wine
Champagne of course!